
My Four-Step Process For A Satiny, Encaustic Finish
Jan 29, 2022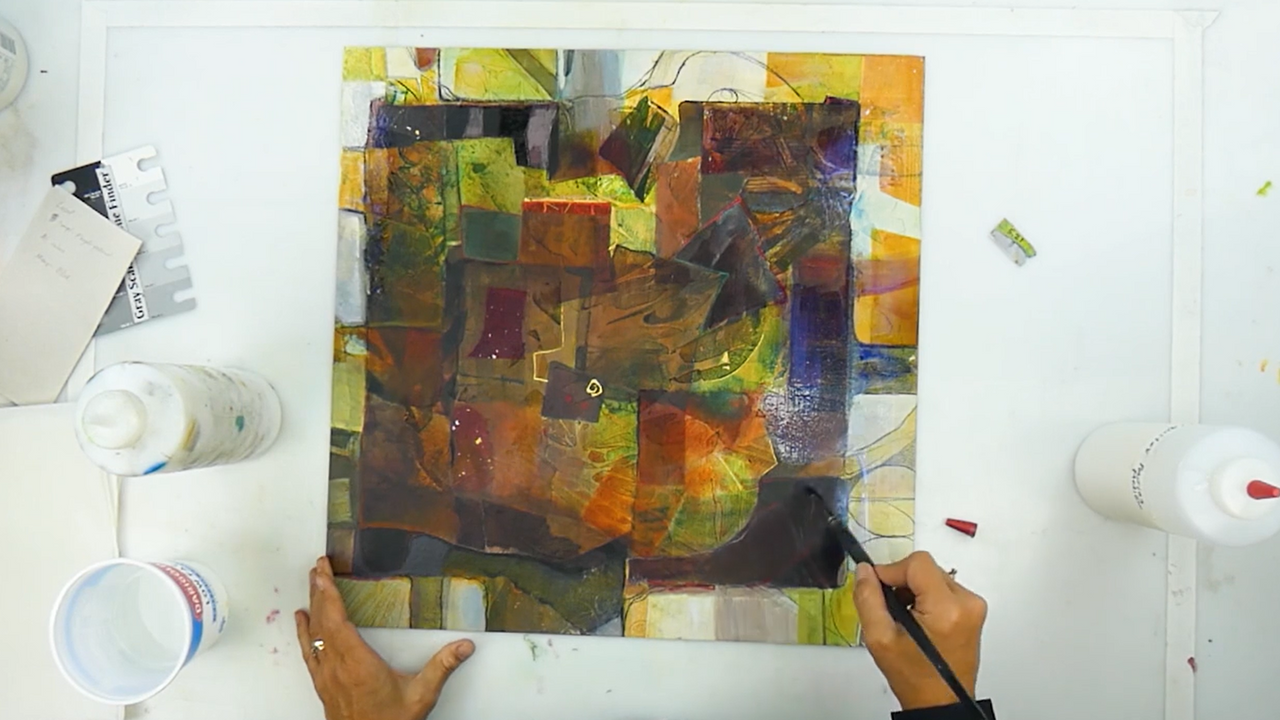
Old, unvarnished acrylic paintings can be livened up now and then to brighten and enhance the colors. Recently, I had an acrylic mixed media work, “Tree of Life, (24x24in”, painted on 300 series Strathmore illustration board.) returned to me after it had been shown in a gallery in Rome, Italy. This painting, which has delicate gold leaf lines and shapes, was never varnished and thus it appears a bit dull. But, with the right tools - we can perk things up! Let me show you what I did!
I will show you my favorite four-step process that includes the following:
- Begin by coating the painting with self-leveling gel,
- When dry, rub the surface with 0000 steel wool
- Apply a very thin film of cold wax medium
- Buff with a soft cloth to a satin shine.
Step 1: I first used Golden Polymer medium on a blue shop towel and blotted any delicate dry marks to “fix” them. This is a very important step to make sure you “lock-in” delicate marks that might smear later. Next, I applied Liquitex pouring medium generously over the surface, moving it around with a soft, clean brush. (NOTE: Golden also makes a similar product called self-leveling gel.) I use the Liquitex product because it gives me a bit more working time (ie, it does not dry as quickly). I spread the pouring medium over the surface rather quickly, making sure the entire surface is coated with a thin, even layer. I allow the excess pouring medium to drip over the sides and onto my table covered with either brown paper or freezer paper. Once the pouring medium is applied, you can see how rich the colors become. When the gel dries, the painted-over portion will appear extremely glossy. Since I prefer a satiny, encaustic-like finish vs a glossy one, I move on to step 2 after the pouring medium dries completely.
Step 2: Once the surface is completely dry, I use a 0000 (very fine) steel wool pad dipped in water to gently rub the entire surface and remove most of the shine. I pay special attention to the corners and edges, making sure the entire surface becomes matte and not glossy. Once the surface was matte and not glossy, I wiped the surface dry with a soft paper towel, removing all the water and bits of steel wool that came of the pad.
Step 3: Next, I take a soft cotton cloth and apply a thin layer of plain cold wax medium over the entire surface, spreading the cold wax in circular motions. Once I’ve applied an even, thin layer, I allow it to dry completely, which takes (approximately 20 minutes,
Step 4: Final step! Once completely dry, I rub the surface to a satiny shine with a clean cotton cloth.
A few Tips:
-The larger the artwork, the more quickly you have to spread the pouring medium since it will start to set up in about 10 minutes. Pour the medium in the middle of the painting and use a soft brush to quickly even out the puddle over the entire piece.
-Let the painting dry overnight to make sure it dries completely.
-If you see any areas you missed or low areas, apply a second layer to completely cover the surface as evenly as possible.
-After you use your soft brush to move the pouring medium around, wash away the remnants of the medium in your brush immediately with soap and water. If you wait too long to clean your brush, it will become dry and hard. However, if this happens, you can use Murphy’s Oil Soap to soak the bristles for several days. Wash out the soap and you will often be able to bring your brush back to life!
FREE GUIDE
Five Must Have Studio Tools Each Under $20
Sign up now to get instant access to the free guide that reveals the 5 most important tools that I always have by my side!
We hate SPAM. We will never sell your information, for any reason.
